
* All product/brand names, logos, and trademarks are property of their respective owners.
Cutting acrylic sheets can look simple, but one rushed cut can quickly lead to cracks, chips, or uneven edges. Whether you are working on a DIY home project or handling larger trade fabrication work, clean cutting is essential for both appearance and durability. Acrylic is widely used for signage, protective screens, shelving, displays, and interior panels because it is lightweight, strong, and easy to shape, but it also requires careful handling during cutting.
Unlike timber or soft plastics, acrylic reacts badly to excess pressure, vibration, and heat. Using the wrong blade or cutting too aggressively can damage the sheet within seconds. Proper support, accurate marking, and controlled cutting speed all play a major role in achieving a cleaner finish.
This guide covers practical techniques for cutting acrylic sheets neatly, along with useful tips to reduce cracking, melting, and wasted material for both DIY users and trade professionals.
Acrylic usually cracks because the sheet is under stress while the tool is moving through it. The most common causes include:
The key is to keep the sheet flat, supported, and steady from start to finish.
Good preparation makes acrylic far easier to cut cleanly. Before starting, check the sheet thickness and choose a suitable cutting method. Thin acrylic sheets can often be scored and snapped, while thicker panels normally need a saw with a fine-tooth blade.
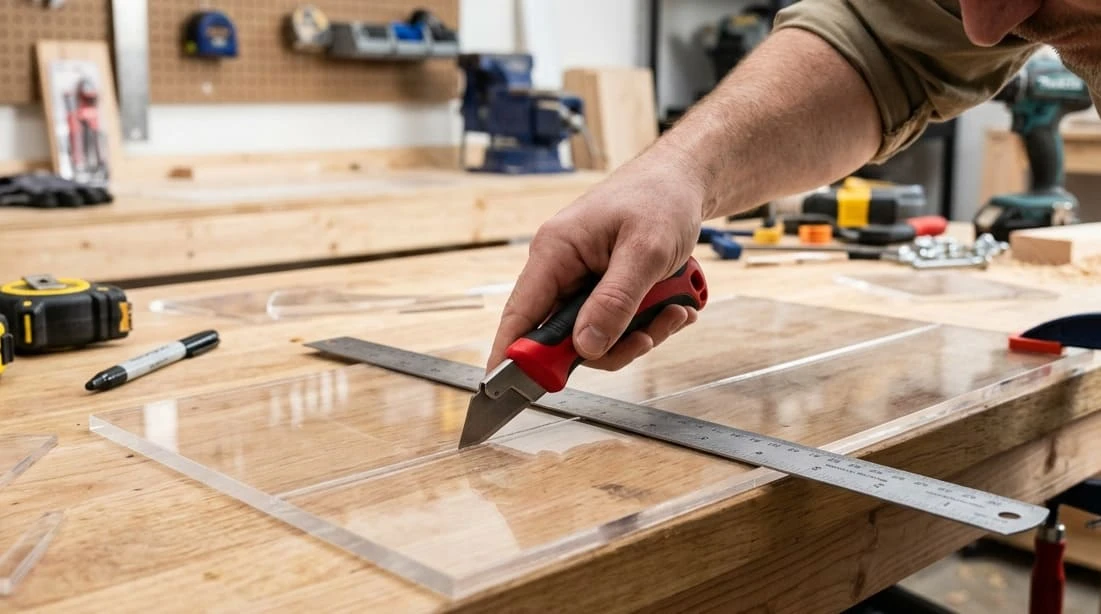
Keep the protective film in place during cutting to reduce scratches. Mark the cutting line clearly using a ruler or straight edge, then clamp the sheet securely to stop movement and vibration. Supporting both sides of the acrylic is important, especially for larger sheets that may flex during cutting.
Blade condition also matters. A dull blade creates heat and uneven pressure, increasing the risk of cracks or melted edges. Using reliable materials can also improve the finish, especially for projects requiring accurate cuts and polished edges. Many DIY users and fabricators choose quality options from the Acrylic Sheets collection at Prime Plasts for more consistent results during cutting and fabrication.
Finally, clear the workspace before cutting. Dust, loose tools, or unstable surfaces can affect accuracy and safety.
Thin acrylic sheets are usually easiest to cut by scoring. Place the sheet on a flat surface, line up a straight edge, and run an acrylic scoring knife along the marked line several times. Once the groove is deep enough, position the scored line over the table edge and apply firm downward pressure to snap the sheet cleanly.
For thicker acrylic, a saw is normally the safer option. A circular saw, jigsaw or table saw fitted with a fine-tooth blade can produce a cleaner cut with less stress on the material. Clamp the sheet securely before cutting and keep the movement steady instead of forcing the blade forward too quickly.
Trade users often prefer table saws for larger panels because they provide more control and straighter edges. DIY users may find a jigsaw easier for smaller projects or curved cuts. In both cases, slower and controlled cutting usually gives the best finish.
Acrylic reacts badly to excess heat and pressure, so small adjustments can improve the final result significantly. One of the most effective tips is to cut at a steady pace instead of rushing. Fast cutting creates friction, which may melt the edges or leave rough marks behind. Using masking tape along the cutting line can also help reduce surface chipping. Some fabricators apply light cooling air during longer cuts to keep temperatures lower, especially when using power tools continuously.
Always test the cutting setup on an offcut first if possible. This helps check blade performance, cutting speed and edge quality before working on the final panel. Keeping the acrylic firmly clamped throughout the cut also reduces vibration, which is one of the biggest causes of cracking. For curved cuts, avoid making tight turns too quickly with a jigsaw. Slow movement gives the blade more control and places less stress on the sheet.
A. Yes, acrylic sheets can be cut at home using simple tools such as a scoring knife, jigsaw or circular saw. The correct method depends on the sheet thickness and the type of finish required.
A. A jigsaw can cut acrylic effectively if fitted with a fine-tooth blade. Slow, controlled movement usually gives cleaner edges and reduces the risk of cracking.
A. Acrylic can crack if it is unsupported, overheated, or cut with the wrong blade. Proper clamping and steady cutting pressure help prevent damage.
Cutting acrylic sheets cleanly is mostly about preparation, patience, and using the right method for the sheet thickness. Thin panels are often easier to score and snap, while thicker acrylic usually needs a fine-tooth saw and steady cutting speed. Keeping the sheet supported, reducing vibration, and avoiding excess heat can greatly lower the risk of cracking or chipped edges. Small details such as blade condition, clamping, and controlled pressure also make a noticeable difference to the final finish.
Whether you are working on a DIY project or a larger trade installation, careful cutting helps reduce waste and produces a cleaner, more professional result.

Sustainable manufacturing is no longer just a future goal—it has become a business necessity.
30 April 2026
Quality control has always been one of the most important parts of manufacturing. But as production
27 April 2026
The manufacturing industry is evolving faster than ever before. With increasing pressure to reduce c
27 April 2026
Be the first to share your thoughts
No comments yet. Be the first to comment!
Share your thoughts and join the discussion below.


